

Printer configuration
The following article provides instructions for connecting your Brother QL820NWB Label Printer to a WiFi network (WiFi only, Ethernet connection is not covered here).
To connect your Brother QL820NWB Label Printer you will have to be in range to connect to your desired WiFi network, and you’ll also need your WiFi password. To use the printer with VisitUs Reception you’ll need to make sure you have the proper label type. The supported labels for VisitUs Reception are the Brother DK22205.
To connect your printer to your WiFi network:
Plug in printer and put the label roll in place.
Turn the printer on. Press and hold the power button, the green power light should turn on.
Press the Menu button.
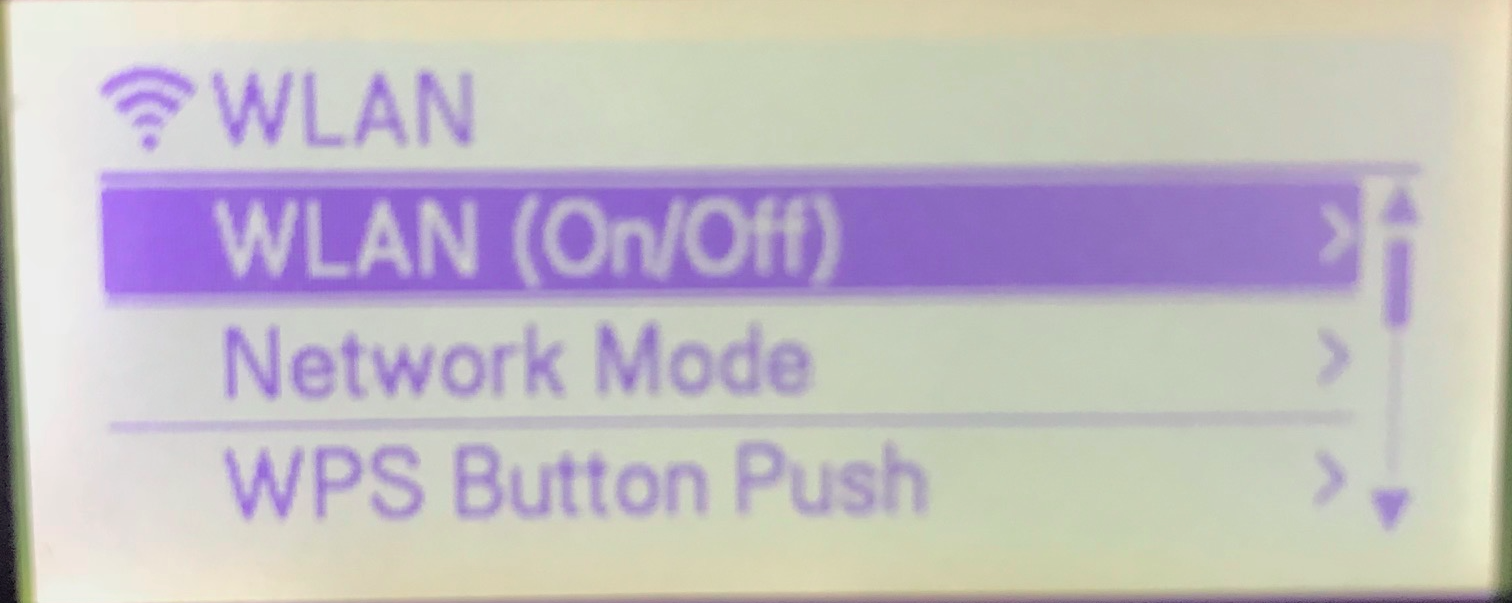
Press the up / down buttons to scroll to WLAN (5 of 7). Press OK.
The first item in the WLAN menu is WLAN (On/Off). Press OK with this option highlighted.
Make sure that On is checked. If On is not checked, use the scroll buttons to highlight it and press OK to turn it to On.
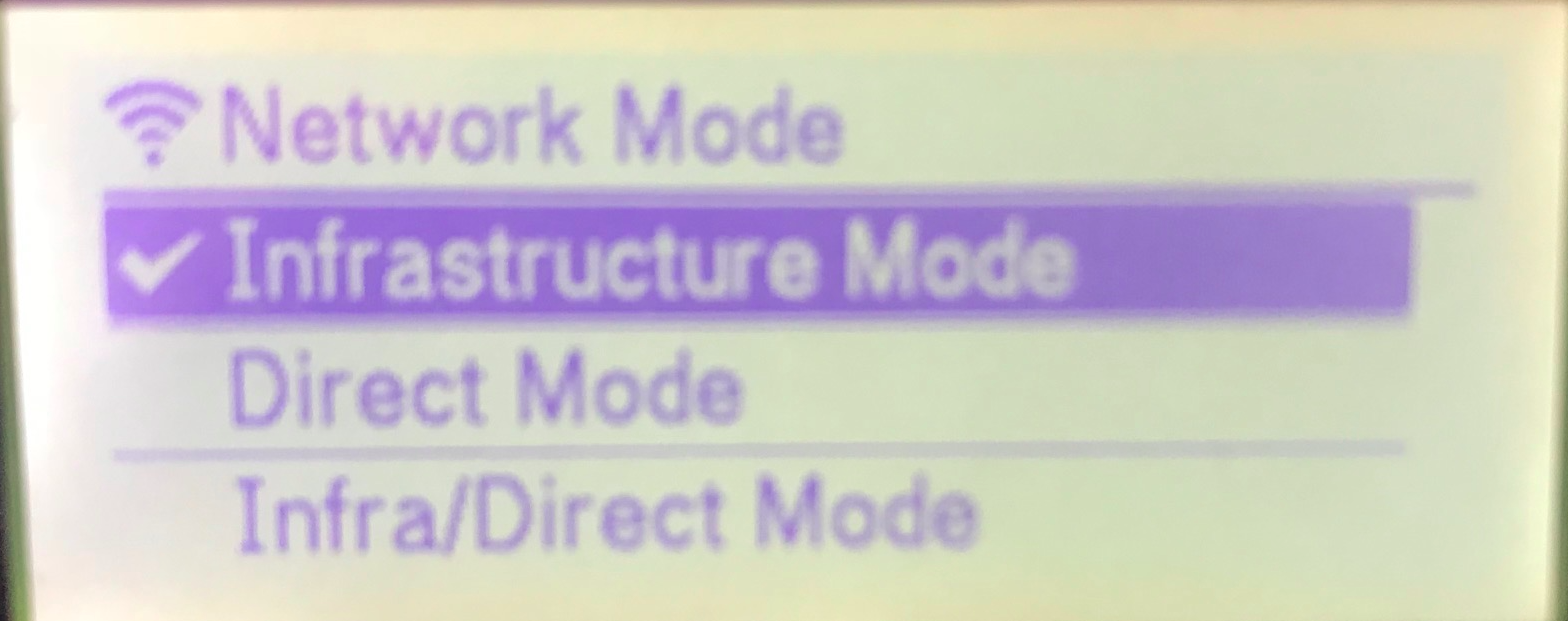
You will be returned to the main menu displayed. Press OK to go back into the WLAN options. Scroll down to “Network Mode” and press OK. Scroll to select Infrastructure Mode, and press OK.
Press OK to go back into the WLAN options. Scroll down to “Infra Manual Setting” and press OK. You should see “Searching” displayed on the screen. Your printer is now searching for WiFi networks
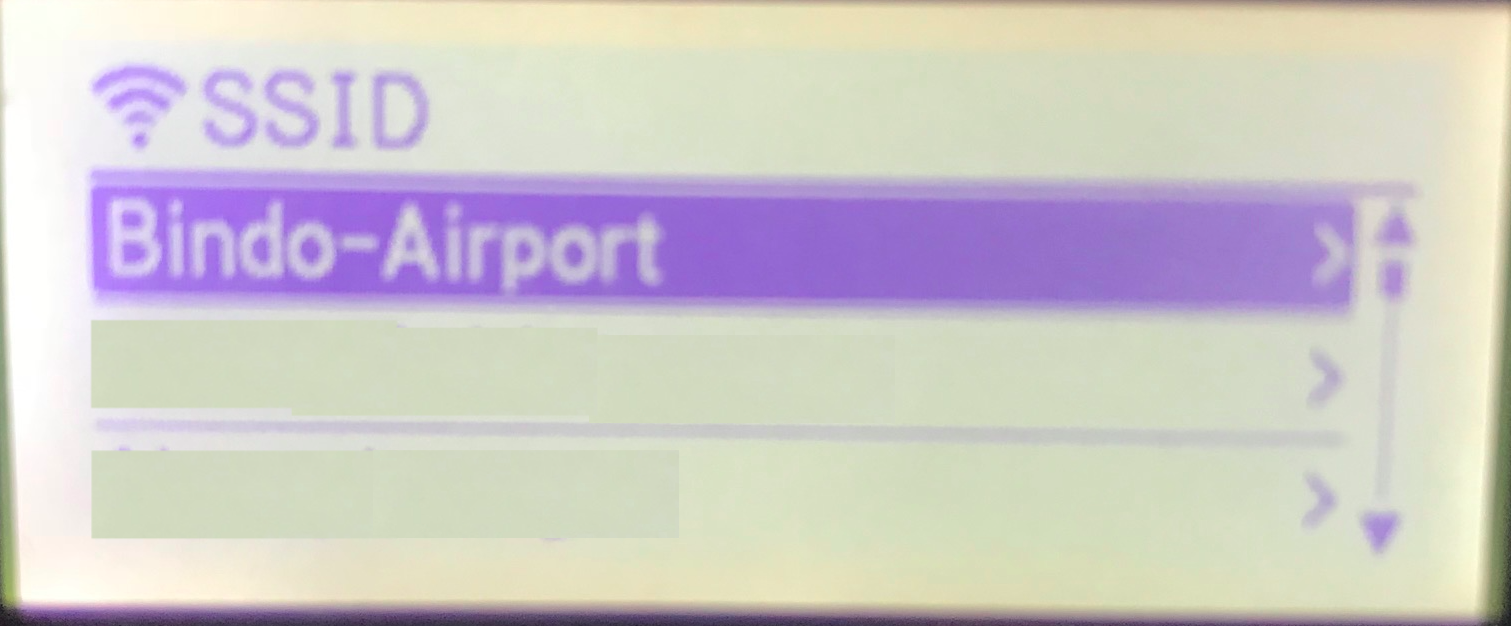
When the results show scroll to highlight your WiFi network and press OK.
Enter your WiFi password. Use the up/down scroll buttons to change a value. Use the Menu button to change between Uppercase, Lowercase, Numeric, and Symbols. Press the OK button to confirm your character selection and move to the next character in your password. Press OK when you’re done entering your password.
The screen will display “Connecting” and finally “Connected” if it does connect successfully.
Once you have completed these steps, you will need to go to the dashboard and add a printer.