

Set-up Active Directory sync using Azure automation
1. Download the Azure Automation Script
Login to your VisitUs Dashboard and then click on Host / Employees on the left.

On the right hand side of the page you will find the Active Directory sync scripts.
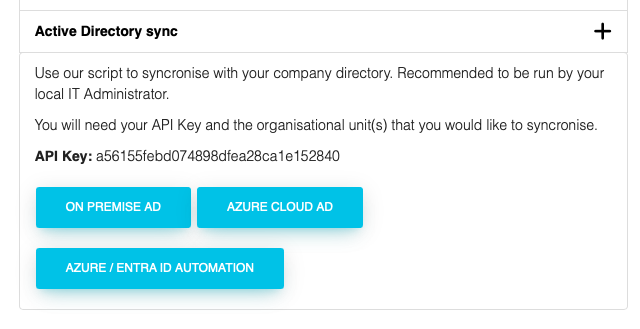
Click on the Azure / Entra ID Automation button to download the script.
2. Create an Azure Automation Account
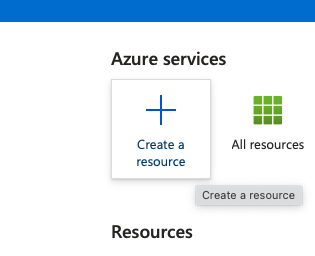
Sign in to the Azure portal. https://portal.azure.com/
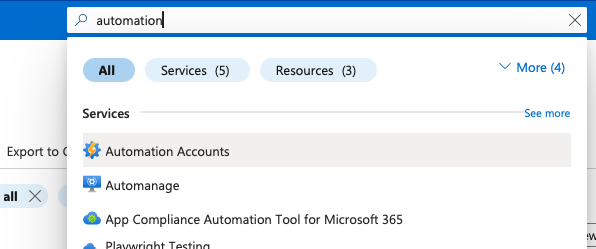
In the left-hand navigation pane, select Create a resource.
In the search box, type Automation and select Automation.
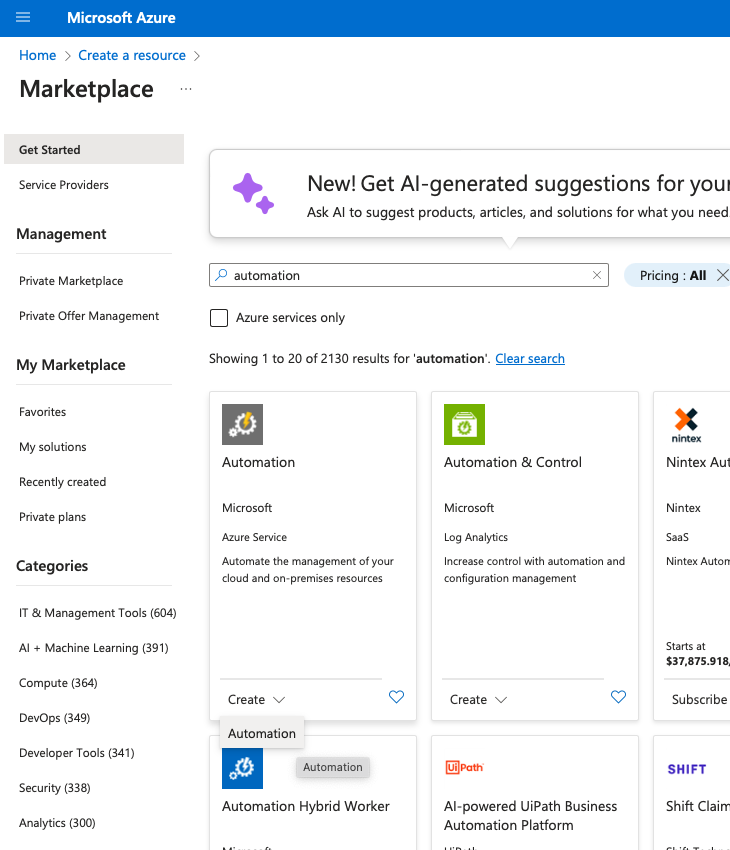
Click Create.
Provide a Name, Resource Group, and Location. Then click Create.
3. Import Required Modules
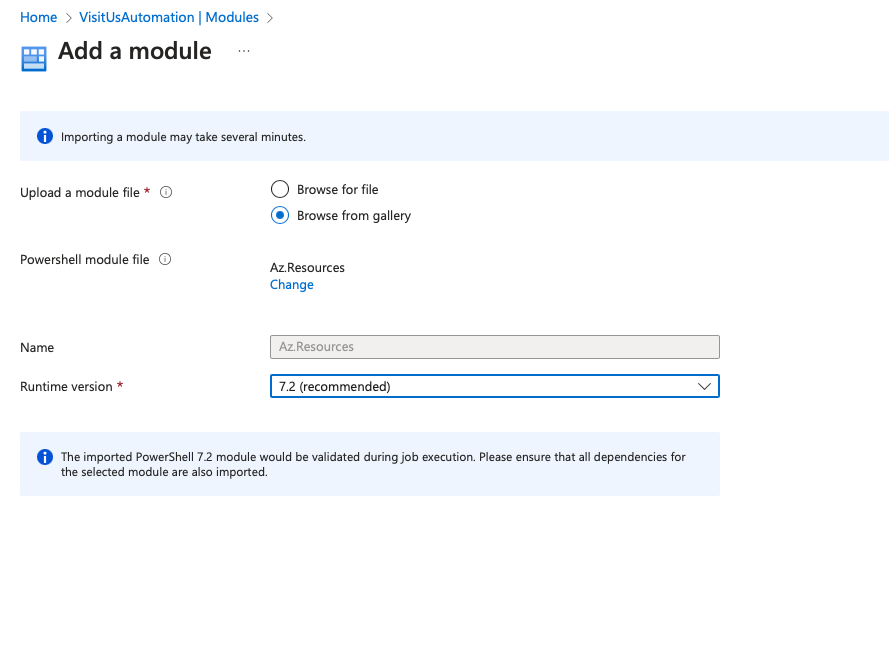
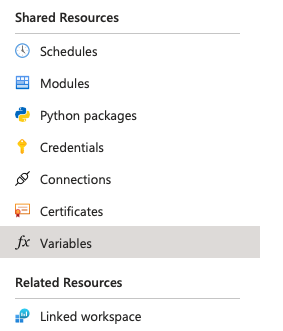
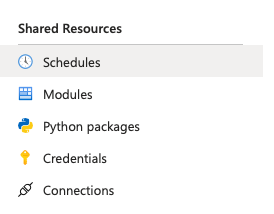
In your Automation Account, select Modules under the Shared Resources section.
Click Browse Gallery.

———–
Search for:
Az.Resources
Click Import and follow the prompt to add it.
———–
Search for:
Az.Accounts
Click Import and follow the prompt to add it.
———–
Search for:
Az.Automation
Click Import and follow the prompt to add it.
———–
4. Creating a service principle (App Registration) to run the script
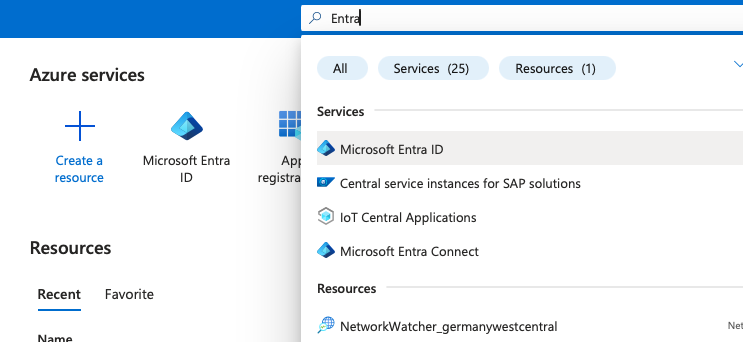
Go to the Azure portal: https://portal.azure.com/
Select Microsoft Entra ID.
On the left hand side click on App Registrations.
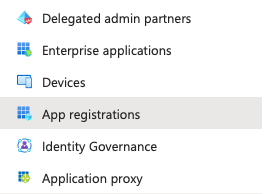
Click on + New registration.
Fill in the required fields:
Name: Provide a name for your application (e.g. VisitUsADSync).
Supported account types: Choose Accounts in this organizational directory only.
Redirect URI: This can be left blank for this purpose.
Click Register.
After registration, you’ll be taken to the app’s Overview page.

Copy the Application (client) ID and Directory (tenant) ID for later use.
Create a Client Secret:
In the left-hand menu, select Certificates & secrets.
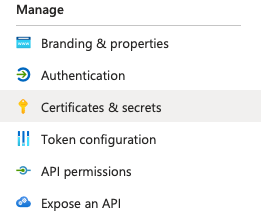
Under Client secrets, click + New client secret.
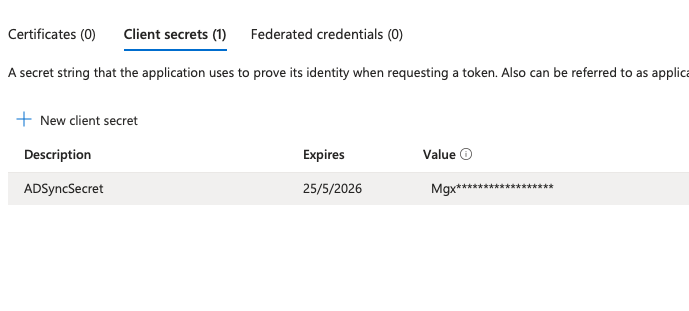
Provide a description and set an expiration period.
Click Add.
Copy the Value of the client secret for later use. You’ll need it shortly, and it will not be retrievable again.
5. Add Automation Variables
To securely fetch API keys, Domain, and Azure group, use Automation Variables.
In your Automation Account, click on Variables under Shared Resources.
Click Add a variable.
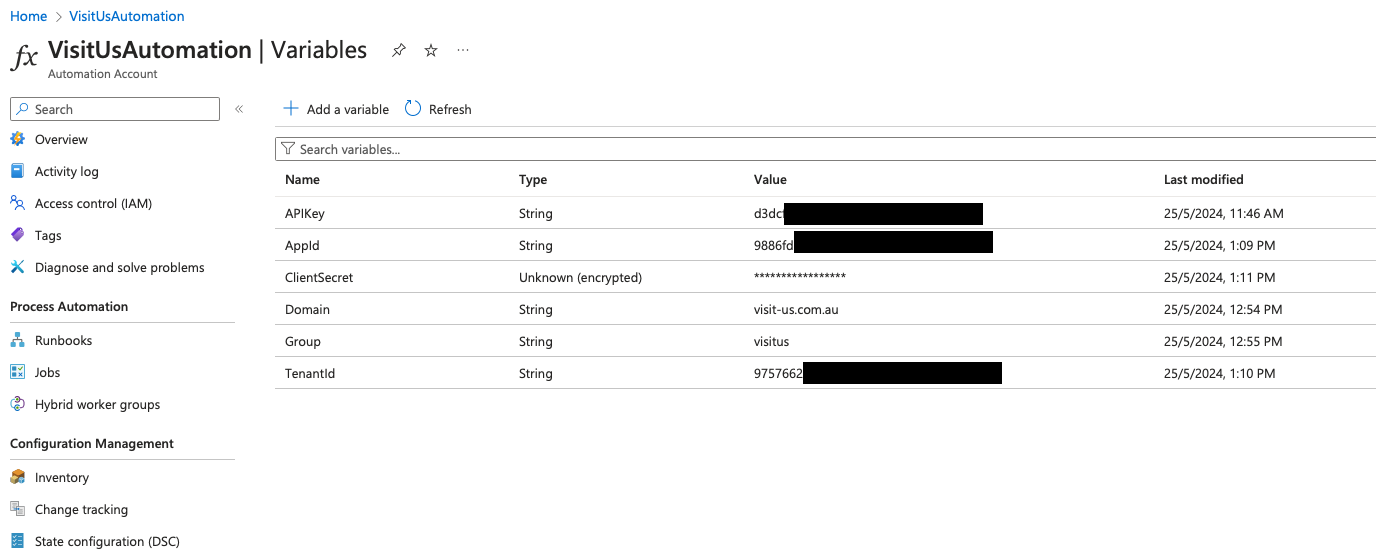
Add six variables named APIKey, Domain, Group, AppId, TenantId and ClientSecret with corresponding values.
———–
Name: APIKey
Type: String
Value: Your API key (found in the dashboard -> Hosts / Employees section then on the right – Active Directory Sync)
———–
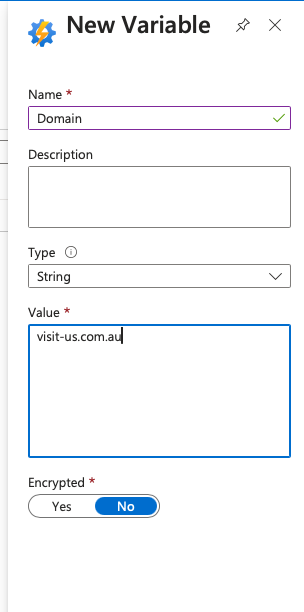
Name: Domain
Type: String
If AU hosted
Value: (If AU hosted “visit-us.com.au” / If US hosted “visit-us.com” / If EU hosted “visit-us.eu”)
———–
Name: Group
Type: String
Value: (The name of the AD group you would like to sync)
Group names can be found in your Azure Portal: https://portal.azure.com/#view/Microsoft_AAD_IAM/GroupsManagementMenuBlade/~/AllGroups
————-
Name: AppId (String, Application (client) ID from the )
Type: String
Value: Client ID from the previous step
———–
Name: TenantId (String, Directory (tenant) ID)
Type: String
Value: Tenant ID from the previous step
———–
Name: ClientSecret (Secure String, Client Secret)
Type: Secure String
Value: The client secret you made in the previous step
6. Assign Permissions to the Service Principal
For the service principal to be able to read Azure AD group members, it needs the Directory.Read.All permission.
In the Azure portal search for App Registrations
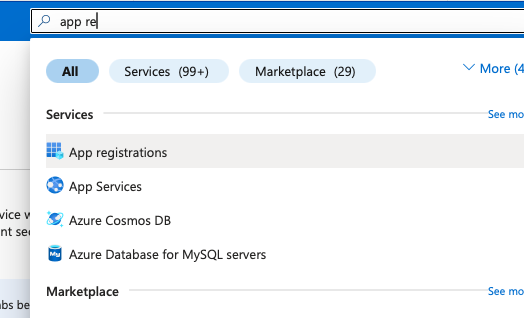
Or use this link: https://portal.azure.com/#view/Microsoft_AAD_RegisteredApps/ApplicationsListBlade
Then click on All Applications.
Click on the App that you created earlier (e.g. VisitUsADSync).
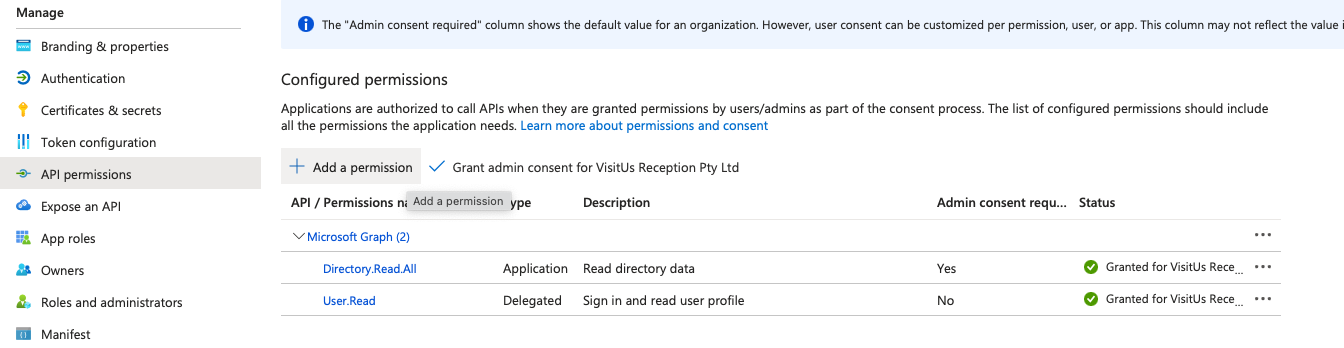
In the left-hand menu, select API permissions.
Click on + Add a permission.
Select Microsoft Graph.
Select Application permissions.
Search for and select Directory.Read.All.
Click Add permissions.
Next, just next to where you clicked the Add a permission you should see an option to Grant admin consent… for the permissions you’ve added. It’s important that you click this.
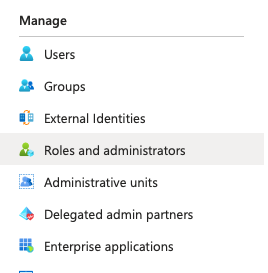
Role Assignments:
In the Azure portal, go to Microsoft Entra ID.
Under Manage, select Roles and administrators.
In the list of roles, find and select Directory Readers.
On the Directory Readers page, click on + Add assignment.
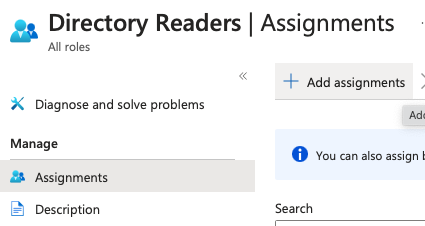
In the “Add assignment” pane, click on + Select members.
Search for your service principal by name (the name of the app you registered, e.g VisitUsADSync).
Select the service principal and click Select.
Review your selection and click Assign.
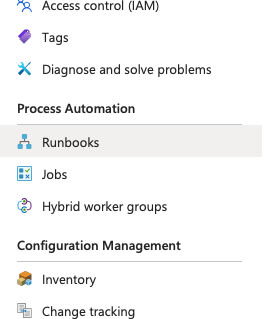
7. Create a Runbook
In your Automation Account, select Runbooks under Process Automation.
Click Create a runbook.
Provide a Name, select Runbook type as PowerShell, and select the Runtime version.
Click Create.
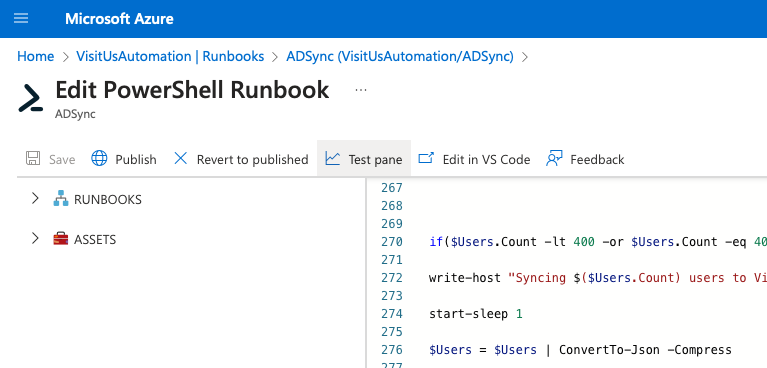
8. Edit the Runbook
Once the Runbook is created, click on it to open.
In the Edit PowerShell Runbook page, you can now paste the VisitUs AD Sync script here.
9. Publish and Execute the Runbook
After pasting the script, click Save and then Publish.
Click the Start button to execute the Runbook.
10. Schedule the script to run automatically
In the Azure Portal, click on the All services button located in the left-hand menu.
In the search bar, type Automation Accounts and select it from the list.
Click on the Automation account you created at the start.
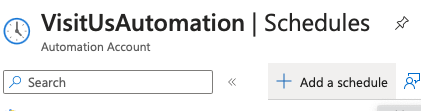
Once you’re in your Automation Account, navigate to the Schedules section in the left-hand menu.
Click on the Add a schedule button at the top.
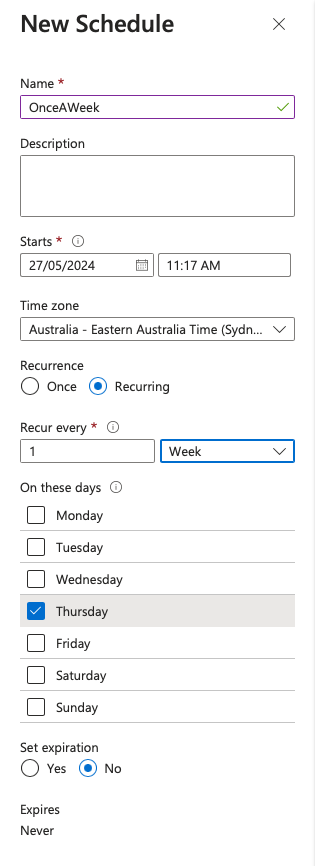
Configure the Schedule
Name: Enter a name for your schedule.
Description: Optionally, provide a description to identify what the schedule is for.
Start Time: Set the date and time when you want the schedule to start.
Time Zone: Choose the appropriate time zone for your schedule.
Recurrence: Choose Recurring.
Recur every: Select week.
On these days: Select a day of the week.
Set Expiration: Optionally, set an expiration date and time for the recurring schedule.
After filling in all the details, click on the Create button to create the schedule.
Link the Schedule to your Runbook
To link the created schedule to a runbook, go back to the Runbooks section in your Automation Account.
Select the runbook you want to schedule.
In the runbook’s pane, click on the Link to schedule button at the top.
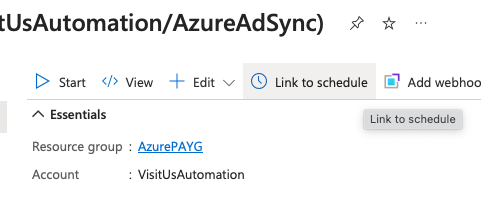
Select the schedule you created from the list.
Click on OK to link the schedule to the runbook.